Creating Print Templates & Report Functions
The Design Atlas 2026 features a highly flexible reporting engine. You can fully customize the appearance of your technical documents by using a hybrid system of Microsoft Word source files and PDF templates.
1. Accessing the Print Menu
To begin customization or to generate a report, use the following steps: * Navigate to the main menu bar and click on File. * Select the Print option. * The Print Interface will open, showing three main tabs: Page Selection, Print Settings, and Additional Options.
 Figure 1: The Cutomize Report functionality.
2. Customizing Templates (Cover, Header & Footer)
Your report design is controlled by two core PDF files located in your template directory. For easy editing, we provide the original layouts as Microsoft Word documents.
The Customization Workflow:
- Locate the Templates: Find your template folder (the path is displayed in the Print Settings tab).
- Edit the Word Source: Open the provided Microsoft Word (.docx) file. This file contains the layouts for:
- Cover Page (
cover.pdf): The first page of your report. - Header/Footer (
header_footer.pdf): The recurring top and bottom sections of all calculation pages. - Design your Layout: Insert your company logo, adjust fonts, or update address information directly in Word.
- Export to PDF: Save or export the Word document as a PDF, ensuring you name the files exactly
coverpage.pdfandHeaderFooter.pdfto overwrite the existing versions. - Auto-Update: Design Atlas 2026 will automatically detect the new PDF files and apply them to your next print job.
3. Placeholder Mapping & Data Assignment
Under the Additional Options tab, you will find the Replacements interface. This tool allows you to link project-specific data to your layout.
- Placeholder Syntax: In your Word document, use double curly brackets to define a placeholder, for example:
{{PROJECT_NAME}}. - Value Assignment: In the Replacements table, assign a specific value or a software variable (e.g., Client Name, Project Number, or Drawing Number) to each placeholder.
- Dynamic Content: During the printing process, the software replaces these placeholders with the actual project information entered in the calculation header.
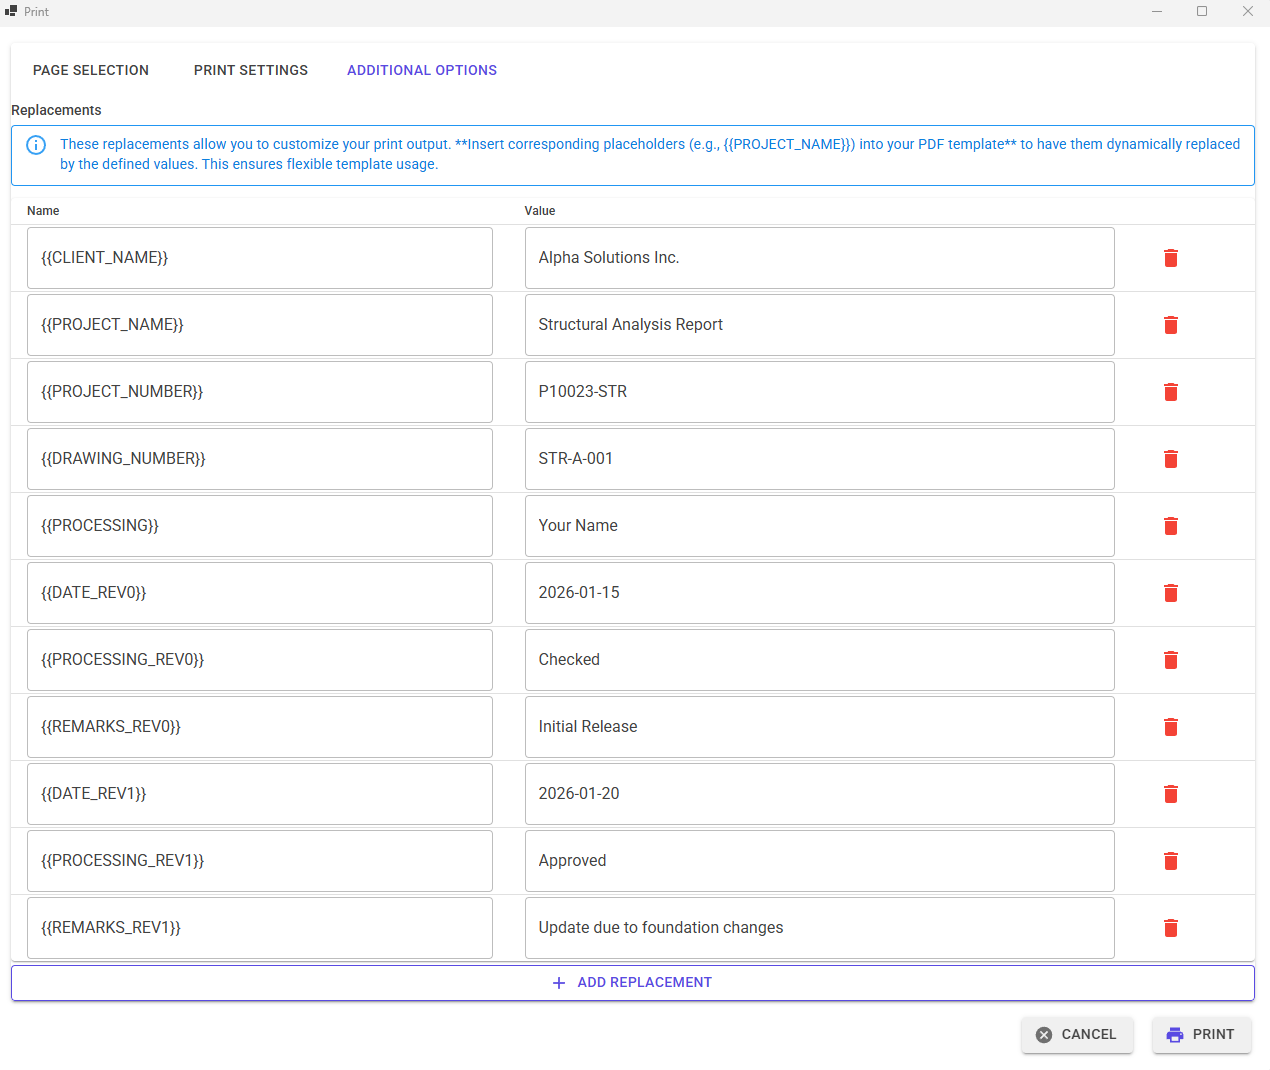 Figure 2: The Cutomize Report functionality.
4. General Print Functions
The print menu provides comprehensive control over the final document:
- Language Selection: Switch the output language of the report (e.g., English or German) independently of the input language.
- Page Selection: Select or deselect specific sections like "Cover", "Table of Contents", or "Material Data" to include in the PDF.
- Calculation Detail: Use the toggles to hide or show formulas (No Equations) or pictures to control the length and complexity of the report.
- Template Path: Easily switch between different template sets for different clients using the "Select New Template Path" button.
💡 Expert Tip: Global Standardization
By saving your customized
coverpage.pdfandHeaderFooter.pdfin a shared network folder and pointing all Design Atlas installations to that path, you can ensure that every report generated in your company follows the exact same corporate design.
Need assistance with placeholder mapping? Our support team can provide a full list of available system variables to help you automate your report generation.